Notorious in 4runners are saggy rear ends thanks largely to factory springs that lose their tension quickly, but also because of the "cut" of the rear guards. Have a look at one with the correct ride height sometime and you'll see the front guards are by design cut higher than the back which only add to that "driving to the moon" look.
So what can you do?
A few options:
- Get some new springs in there. Expensive but it's done and done right.
- Have the springs retensioned. They don't hold their tension after being heated up and "reset". About a year is the rumoured lifespan of a retensioned spring. Alledgedly the heating destroys some of the springiness of the spring.
- Get a new leaf added. Not bad - but the new leaf ends up taking the entire load. Very cruel.
- Do both of the above. Better, you'll get more life out of them for sure.
- Put in air shocks and pump em up. Bzzzt. wrong answer.
- Put much longer shackes on. This forces the spring down, lifting the car up. Not bad but a sagged spring is riding mostly on the toughest leaf. You might be back up at height but the ride will be stiff-as. In addition springs like to be curled, not flat. When they are flat (ie sagged) more sagging happens even quicker. Never tested but I suspect the sagging will continue with this option.
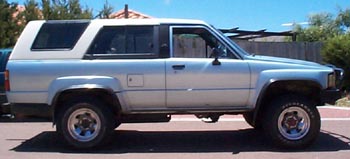

Before and after shots. Quite a difference
Looking at the before photo you can see the ole '87 had a serious case of the sags. Somebody had tried the air shock solution and the air shocks were stuffed as well - from spending there time being pumped up trying to hold the truck higher off the deck. Only one answer, new springs.
Pedders make aftermarket springs, $AUD220 a side. Throw in new nolathane bushes and you've just spent $AUD500 on parts. C'mon, it's not that bad.
But you want to install them yourself? Don't do it! It's only $80 for a professional to do it! Life is short! Now we've gotten that out of the way, this is how I installed mine... ;)
Installation
- Grab the toughest 19mm socket, the toughest t-bar and the toughest long chunk of pipe to act as a t-bar extension you have. WD40 and possibly your LPG bottle with heating tip. You're gonna need them to break the 8 U-bolt nuts holding the leaf to the diff and the 6 shackle nuts.
- Jack up the chassis to take the pressure off the springs and put some chassis
stands under the diff arms.
Do one side at a time. Undo both the diff u-bolts and pull them off. Nothing is going to move because you jacked the chassis up. Undo the front spring pivot nut then undo the two little bolts that hold the pivot bolt to the chassis. Tap the front pivot out.
It will probably look a bit like mine pictured here. Rusty and pitted. Hate that. You can buy new Toyota made ones or you can give them a light sand just to get the rough edges off and throw them back in. Note: was unable to source aftermarket ones.
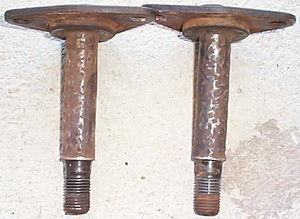
Rusted and pitted but they can be much worse I'm told. - The rear pivot is the shackle. Undo both nuts and pull the side plate off. With some manouvering the spring will now pull out.
- The new spring will be much more "curled". Put your new nolethane bushes in and
use some of the proper nolethane grease. Either jack the car up further or pop
another jack under the diff, remove the back wheel and lower until the spring will
fit into place.
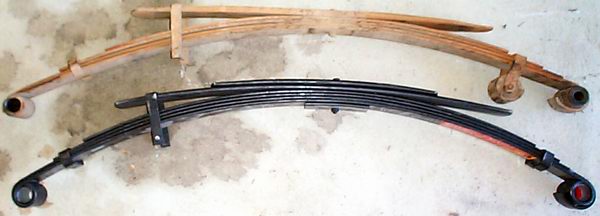
Stock spring versus pedders spring. Note the one thick standard leaf is replaced by
two not-as-thick leaves on the pedders version. Oh yeah, the black one is the new
one. well duh.
- Put all the bolts back in and repeat for the other side.
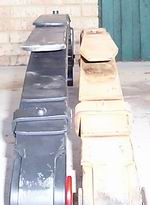
Comparing springs.Watch out!
The springs I was supplied with required longer u-bolts. They have an extra leaf which made the spring an extra 15mm taller in the middle. New u-bolts (4 of) will only set you back about $30 all up.The closest I could get were extra long u-bolts with a heap of thread to wind them right up. It would have been nice to have 15mm longer u-bolts rather than 80mm longer ones - but the angle grinder lopped off the bottom "slack" to prevent me from deep-ripping the ground as I drove... ;)
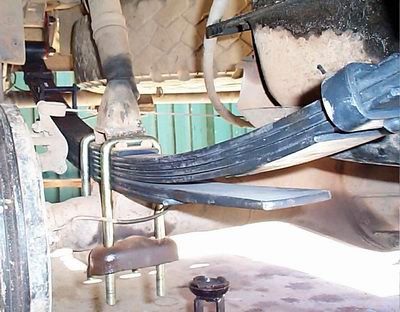
Get it all back together - here you notice the new u-bolts.
You are pretty much done. Get it off the jack/stands and be amazed at the height difference. I saw about 4 inches at first. After a drive around the block to let it settle it dropped back down to 3-3.5 inches. Felt much better but looked like a randy tomcat!
You aren't supposed to wind the front up too much as excessive angle on the CVs can wear them out real quick. I pulled the front up about 10-15mm more just to even her up a bit. Have a look at the gap better the upper control arm upper bumpstop and the lower control arm lower bumpstop. Factory setting is equi-distant. A little extra isn't going to hurt but you have been warned...


 database