How hard can that be to do it yourself? The idea: a wood pergola. Quotes to have one built started at AUD$5000 (1997). No way - I could build one for $AUD2k easy!
Well that was my first call. Okay, it only cost me around $AUD2.5k (1997) but now I know why they put a big price tag on labour...
But don't be put off - what you see here was a lot of fun. Mates from everywhere offer assistance (it's a built-in blokey thing. Ug. Big bit of wood. Ug. Bolt. Ug ug. You get the idea, it's just good back breaking fun).
So as long as you are organised - have all the wood, have ladders, bolts, cartons of beer... you'll find anyone will offer to help.

All parts get spray painted *before* construction begins...
Paint all parts ON THE GROUND; beg, borrow or buy a spray gun to paint it with. DO NOT paint with a brush unless you are some sort of masochist, and I'm talking a serious masochist. You can buy "splat guns", that is, airless paint guns, for around $AUD50 (2011).
Note here that I'd already put the stirrups in the ground. 450mm*300*300 are the local regs for the footings - I did everything to local regs. Armed with a wheelbarrow, a couple of bags of cement and plenty of blue metal. Check the cement bag for mixing quantites, I went a fairly stiff mix being close to the coast.
Get your local council approval. It'll cost you a few bucks but it pays to eliminate potential heartache. I had only just applied for approval at this stage. Oops. Lucky it was approved hey! Well, I specified it all to the councils regulations before I drew up the plans so you'd want to hope so.
Go to town on string lines. String lines on the ground, string lines in the air, and measure measure measure. Distances, angles, EVERYTHING... As they say, 'measure twice cut once'.
This is actually 2 weekends worth of work. I bought a circular saw, they are cheap and constantly getting cheaper so don't muck around. Note that the standard 184mm blade will not cut through a 100mx100m post - you'll have to turn it over and cut through the other side.
Posts bolted into the stirrups, beams bolted between the posts. Posts are notched to accept the beams, and the beams join at each post.
In the roof I installed rafter bolts. Being a tin roof I unscrewed the first few row of tek screw so I could lift up the bottom of the sheets just enough to bolt them to every rafter. Overkill, every second would be enough. A rafter bolt is a plate of metal with a length of thread welded to it that you attach to the side of a rafter, and the threaded rod pops out through the fascia. Your local hardware guy will have them.
The posts have 2xM12 bolts on the bottom, and 2xM12's for each beam. Definitions: Post is the bit coming up from the ground (100mm*100mm). Beam is the bits joining the posts together (200mm*50mm). Rafters are the bits yet to come (150mm*50mm). Battens are the skinny bits that you hold the roofing material down with (50mm*37mm).
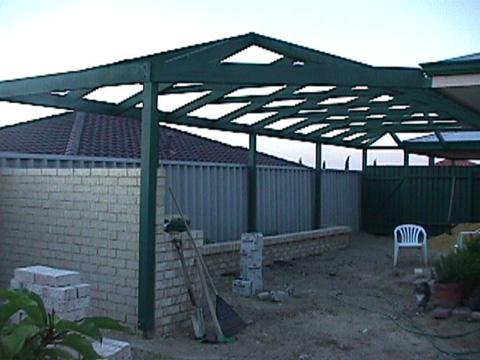
Hips completed.
All the wood I used was rough sawn jarrah and karri, Australian hardwoods. Pretty rare these days, in fact if I was to ever build another pergola it would be seasoned, treated and finished Pinus Radiata. In todays environ-mentally conscious world Pinus Radiata is *the* renewable source of structural wood (at least here in Western Australia), what's more being finished not rough sawn means it is really straight and a pleasure to paint. Being a softwood though the sizes would be bigger for the same spans (refer to the spec sheets available for the product you are using).
I hadn't taken a picture in ages. Here you can see the finished structure. How does it get together like this?
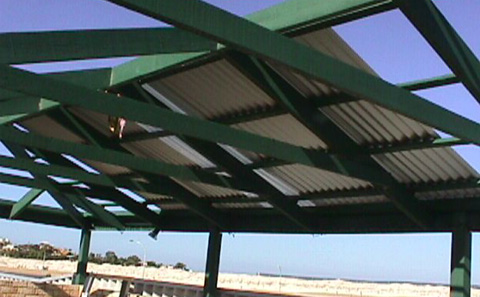
- Each rafter assembly is put together into a truss formation on the ground. The truss looks like an 'A' - the two rafters going up from each side, and horizontal piece of wood joining them. This is the simplest form of truss you can make. Note that the design is not actually a "gable", techincally it is a "hip". "Gable" means flat ends, ie only 2 faces on the roof. "Hip" means four faces, like a pyramid
- On the beam, and on the pole plate (the bit that is bolted to the fascia with the rafter bolts, just underneath the gutter) I bolted on joist hangers. Tin metal 'U' sections that the rafters are bolted to.
- Across the top is a ridge. It was joined in with the rafters using a basic joint section - ie cut a notch in the ridge, cut a notch in the top of the truss, and bash them together.
- Each truss was lifted up (with two guys on either end) into the joist hanger, and then bolted up. Once in the joist hanger, it's not going anywhere. In fact it was 2 weeks later before the bolts were actually put in...
- The diagonal bits in each corner to complete the hip were measured up, some tricky 45 degree end cuts made (think hard about them before you cut), supported in place and nailed in.
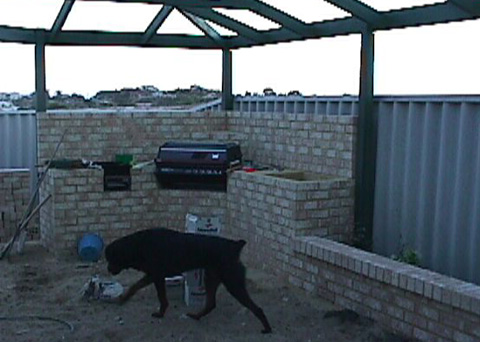
BBQ project under construction. Who says you should finish one project before moving to the next? ;)
In this picture you can see another project taking shape - the BBQ...
Well that is the main structure finished. All that is left is battens, and roof sheeting. I bought tin sheet and 'opal' tinted polycarbonate (product name "Laserlite") from my local Stratco. The tin sheet was about $AUD6 (1998) per linear meter, and the polycarb $AUD12.50 (1998).
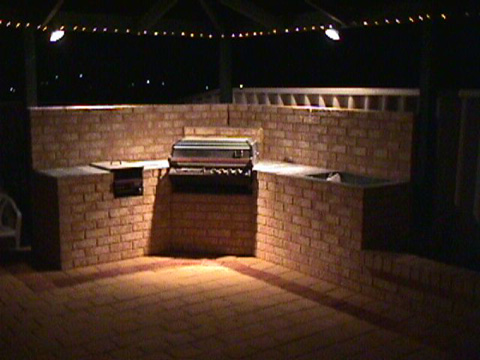
Paving & BBQ complete under lights at night.
A night time shot - Nice fairy lights, some decent spotlights for the BBQ and Wok - give it an inviting look. However certainly makes the dust show up...
Had some chaps come around and do the paving. These match our driveway, they are 190x 190x 60mm cement 'blokpave' pavers. On the driveway we sealed them with an acrilic lacquer designed for cement. I helps keep the colour and stops the dirt and oil from staining. I didn't do it out the back, firstly because it doesn't have cars driving over it, and because I'd need about 2 10L cans of it at about 100 bucks a pop. Do you think I'm getting cheap and nasty or just slack?
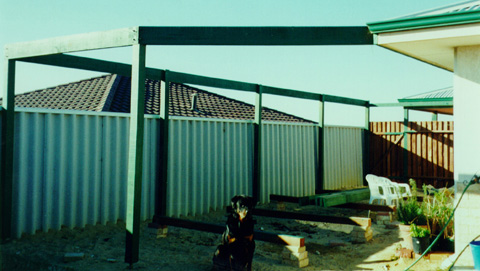
Pegola before the roof project begins.
The missus went out and bought this be-yewtiful outdoor setting, oiled jarrah and I reckon it looks great. Cost a bit, so not much more on the construction front...
With the hot weather coming we decided it was time for some roof sheeting. The plan was:
- put up some guttering - had to be on the inside of the beam which was not preferred - mainly because it would be hanging over the fence otherwise.
- use a combination of tin and opal polycarbonate. The theory is that as the sun goes down it hits the side of the house with lots of windows and really heats up - tin on the west side will reflect it away. BUT - on the east side use opal polycarbonate to let the light in otherwise it might get a bit dark and dingy underneath during winter.
I screwed the battons on rather than nailing as when the battens start to warp (which of course they will) they wont pull a screw out, but they would pull out a nail. There are these useful screws, not suprisingly call "batten screws" which do the job just nicely.
The battens are 75mm*35mm jarrah. Putting up tin is not as easy as it sounds (suprisingly), but I can suggest this:
During the installation of the roof sheeting.
- Don't do it on a windy day.
- Work from one side and move across - careful not to sit on the sheet as you screw it down as this will distort it (oops)
- If you can, lay out all the sheets before you start screwing them down. This will make sure they are all lined up nicely and not slightly skew - "walking" off the pergola. Not always possible so at least get 3 or 4 up and straight, screw them down, then work from there.
- Overlap 1.5 corrigations with the overlap on top (this is ya standard corrigated iron here)
- at the bottom and top put a tek screw in every second corrigation. All other rows have one on the join, miss 2, miss 3, miss 2 and you are on the next join. This is for the windiest conditions, only cyclonic conditions require more screws.
- rule a line with a pencil for locations of the tek screws as you lay each sheet down - use the middle of the battens as a guide of course. If you forgot, use a stringline. That way is not necessarily as accurate, your battens may not be perfectly straight all the way along your pergola!
- drill a 10mm hole into polycarb sheets before tek screwing down - it's part of the warranty and is supposed to stop cracking. It's pretty tough stuff though. There is a side that must go towards the sun, it's clearly marked.
- make sure that the tek screws you use aren't too long. Mine popped through the bottom when fully home - had to sand the bottom off each on a apply some touch paint - hate that.
- oh yeah, a standard zinc alume corrugated sheet covers 760mm and the polycarb has one corrigation less then the tin.
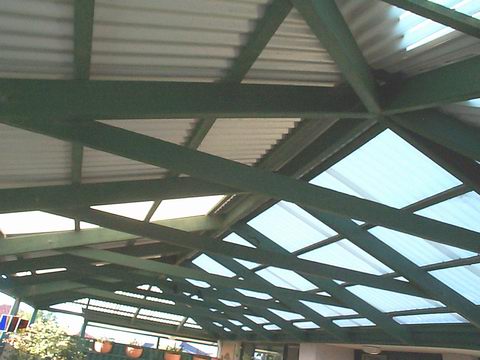
Looking underneath at the finished roofsheeting - tin is on the east side.
So what pearls of wisdom have been gleaned from this exercise?
- Get council approval first. My first neighbours didn't mind it at all, but if my next neighbours did, and complained, and it wasn't approved, what are you going to do?
- Get the right gear. If you are going to spend the time and money, just do it. Tools you'll need as a minimum: circular saw, ladder, clamps, spray gun, tape measure, bevel (essential for getting those strange angles) spanners/screwdrivers/hammer, drill.
- Measure measure measure. Get someone to check your measurements. I cut one post a bit short - had to buy another one at $AUD40 (1997) each...
- as for the hip: if I was ever going to do this again, I would nailgun it and not pre-make trusses. The method would be to get some looong supports and rope to hold the ridge in place, and then measure up each rafter, cut it, hold it in place and nail it, end-butted to the beam and the ridge. My method here is stronger, but it's overkill. The house will blow away before the pergola does.
- Do it yourself if you are that way inclined, but for me to reach completed structural stage was around 15 days of hard work, and was streched over about 5 months. It's a long time to wait, the missus's can get annoyed. Make sure you have some help. You can do most things by yourself, but there were some that required another set of strong hands.
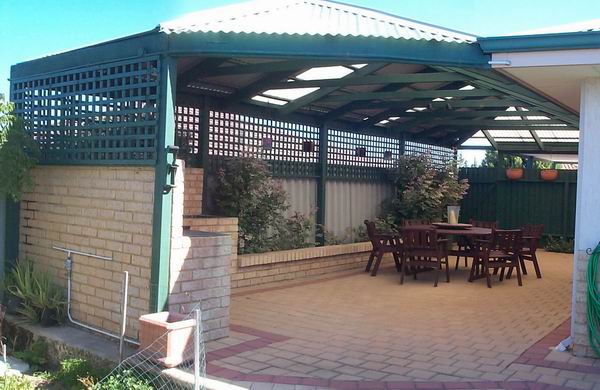
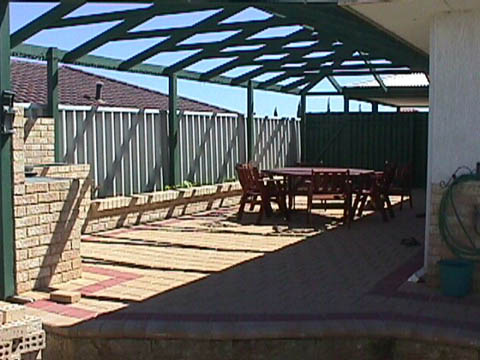
The finished product, with lattice added to nice effect and some protection from the wind.


 database