Cornice? No worries. Um, I think.
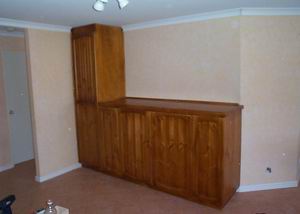
We've had a cabinet maker knock us up an entertainment unit, he's come around and installed it and it looks great. Keeps the TV and home theatre setup out of sight when not in use and is reinforced with a metal frame so the (eventual) 1 ton of water and fishtank on top wont collapse it.
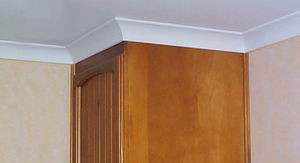
However, as a wise man once pointer out to me, "anything that reaches the ceiling line should be part of the cornice, it will look wrong otherwise." Well, he was right.
 |
 |
| Installed entertainment cabinet, but the ceiling line needs work... |
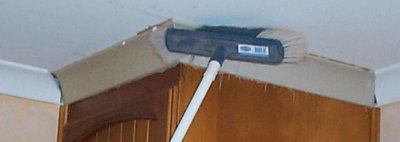
...much better. |
In traditional JAW "I-can-do-that" style and "how-hard-can-it-be" here is a little story about where I found the tricks of cornice work are. Essentially cornicing is about measuring, cutting with a mitrebox or mitre saw, but most importantly it is an exercise in 3D visualisation.
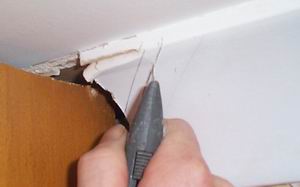
Firm action on the knife will
make short work of the plasterboard.
What do I mean by that you may well ask?
It is about picturing the cut you have to make, cutting it, and finding you got it right ;)
The first issue I had was that the cabinet maker had hacked the cornice so that he could fit the cabinet in and I had to re-cut it on the angle and in the right place so I could fit in two pieces of new cornice. The cornice by the way was acquired from the scrap pile of a new house in a new subdivision - an excellent source of small pieces of cornice.

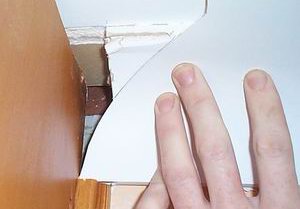
Make a template...
Don't be fooled - you can't just draw a 45° line and start cutting. Sure, it is a 45° join but the *surface* of the cut is not even a straight line. But it is easy to make a template of the cut you'll need to make.
As you can see I've put a bit of paper up against the old piece of cornice that used to be where the cabinet was - it has the same cut that I want to have. Put it near the spot you are about to cut to reassure yourself that it is the right angle. Hold it up against existing cornice corners around your house and be doubly reassured that it is the right angle.
If you don't have an existing piece of cornice then sacrifice a bit to make a cut that you can use to make your template.
...apply the template.
Cut the piece of paper along your line and press it against your new bit. Mark a pencil line. Cut at a slight angle - think about the direction. If you don't get the right angle not to worry, it is the pencil line that is important. The rest is behind; besides, that's why you buy bog (putty) for.
Note that for the opposite side 45° cut I simply turned the piece of paper over thus "mirroring" the template.
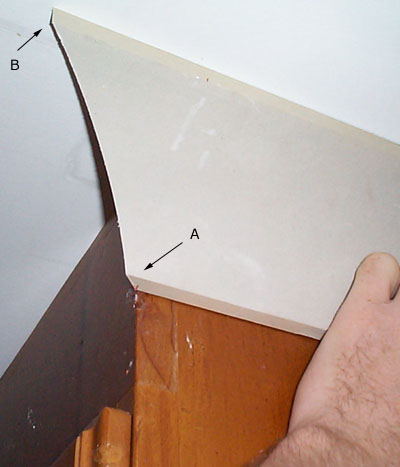
A cut, note how B is up/down, A is 45°.
Out comes the mitre saw and compared to cutting wood, plasterboard cornice is a snap. Again, look at existing cornice and picture in your mind the piece you need to cut. I'll try to explain it all with this picture.
The length is easy enough - measure the spot that it is to fit in. Near 'A' here the end of the wood marks the length.
Put the piece into the mitresaw such in the same way it would fit in place. Hmm, I should have taken a picture.
Adjust the saw for 45° in the right direction. Here is a key piece of info that I worked out after messing up the first two pieces. Look at 'A'. See how the narrow flat edge is cut at 45°? Now look at 'B'. See how the same narrow flat edge is cut at 90°? Think about 2 pieces joing together. On the bottom, the angle is 45° because they join on the horizontal. On the top, the angle is 90° because they join on the vertical. As you cut you will get the first edge at 45° where the blade hits, then the final edge will be 90°.
With the measurement, mark off the distance on the cornice and cut so that the angles line up where it will be against the wall. You can just see where I marked and cut to, near 'A'.
Play with some test pieces and firm it up in your mind. I found this 45°/90° was the pivotal point in picturing the whole 3D shebang in my mind. Not surprisingly, up until then, I was making a few making wrong-end cuts ;)
Stuck into place.
Mix yourself up a batch of cornice cement, apply liberal amounts to the back of the cornice and press into place. You shouldn't have to hold it in place for long, cornice cement is designed to stick quickly.
Don't look too hard - on both sides where the new cornice cuts into the existing cornice I botched the 45° (I made those cuts before I was "at one" with 3D visualisation). But, you mixed up a bit of spare cornice cement right? Well it makes a good bog as well as glue, slap a heap in there and "carve" yourself a cornice "repair" :)
Usual story for bog, mix to a paste, add, when semi-dry scrape off excess with a metal spatula. Never use sandpaper! Ever! I think I've mentioned this before. When bog is semi-dry or dry the flat end of a spatula makes an excellent weapon to scrape away targetted bog but won't touch, say, a painted surface. Sandpaper on the otherhand can wreak havoc.
Example: think of a hole in plaster that you want to bog. You bog it (with a pasty mix so it doesn't drip away), leaving it sitting proud of the wall. Case (a) 24 hours later you hit it with a sand block. Bog is harder than plaster so as you are sanding the plaster is coming off and you end up with a big area of uneven bleurk. Case (b) an hour later you use you wide bladed spatula and scrap in a pushing forwards motion. The existing plaster acts as a "leveller" and is not touched by the spatula and yet the excess bog is coming off faster than sandpaper ever could.
Trust me on that one :)
Bringing the cornice story to a close, you've bogged it all up and scraped it flush; paint it. I found taking a sample of the old cornice and getting the local paint guy to knock me up a tin based on that was fine. They have a good eye for what a paint will look like when it is dry. It was not an exact "you'll never see that!" match, but in anything other than direct sunlight on the right angle you'd never know I was even there.
I hope this has prevented someone from learning about 3D 45° cuts the hard way and has helped expand the spatial recognition part of your brain like it did mine, but to be honest, I think that will only happen when you do it for yourself. Good luck!
JAW


 database