Perth Western Australia is not a particularly cold place...I don't think it has ever gone below zero Celsius...but a fireplace has a certain eternal appeal and charm that would make a great feature on an otherwise long bare wall.
Completed electric feature fireplace
My wife doesn't like the smoke that can go everywhere with a real fireplace, and I don't like gas heaters, even though we have a gas bayonet right there - there is no need to breathe in combustion exhaust gas.
But we had experimented with a smaller fake fireplace years ago, they are basically a little drum projector putting pretty flame colours on a screen, with glowing logs underneath. And a 2kW hairdryer to actually make heat. Yep, totally fake but we really liked it so decided to get a bigger one and build it into the wall.
First up decide on some dimensions and some look and feel. This is where my wife excels, I don't even try, my interior design skills have a net negative effect on her abilities.
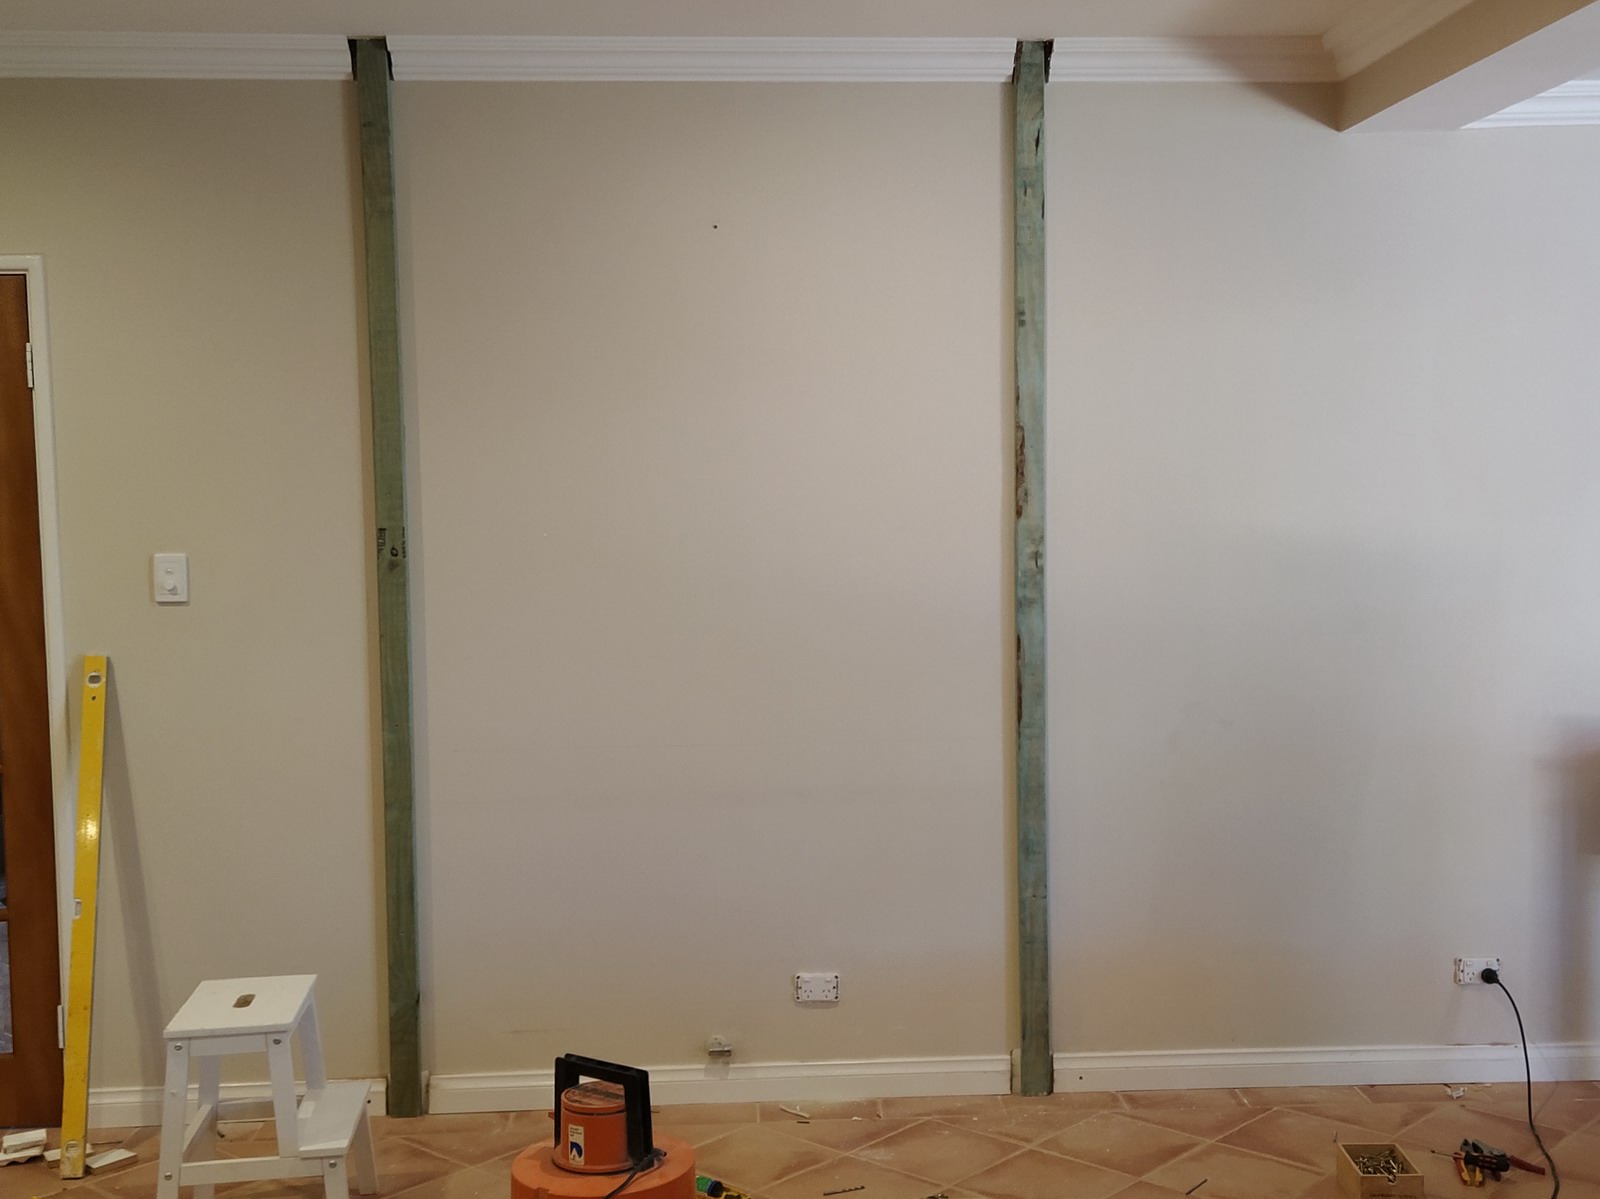
But I know what I can build, so that is where I do actually help. And putting up some tape to visualise the sizing and positioning I can also do. The stone tile she had her eyes on, which are available from Bunnings, were going to be pretty doable. Especially since I still have a 600mm wet diamond saw in my possession.
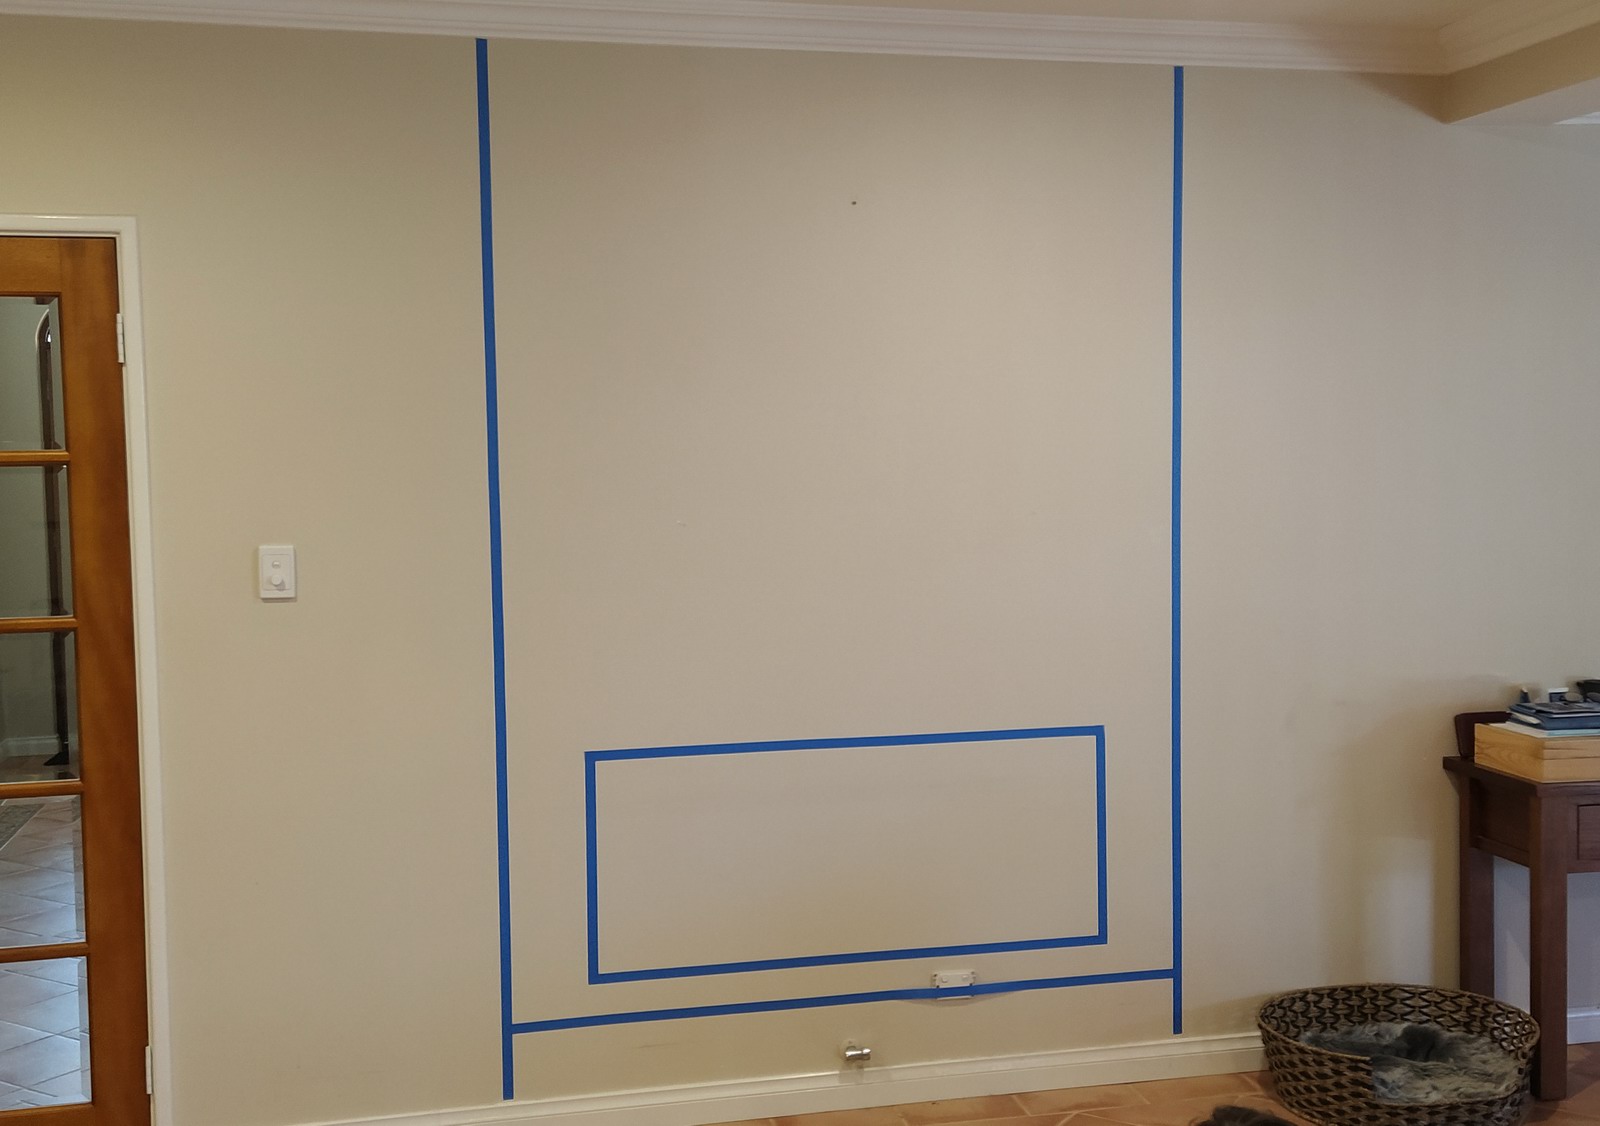
"Something about that size, about there"
There was already a powerpoint in the right spot, but once it was covered over we still wanted one nearby. Remember, doing your own electrical work is illegal. My sparky just used his rotary hammer drill in chisel mode, makes a bit of a mess, but since he never bothered to buy a proper chasing tool, which he should have done years ago, it had to do. And he is pretty good at patching up the wall, been doing it for years. The secret is to just use cornice cement - it is cheap, strong, dries fast and is easy to sand.
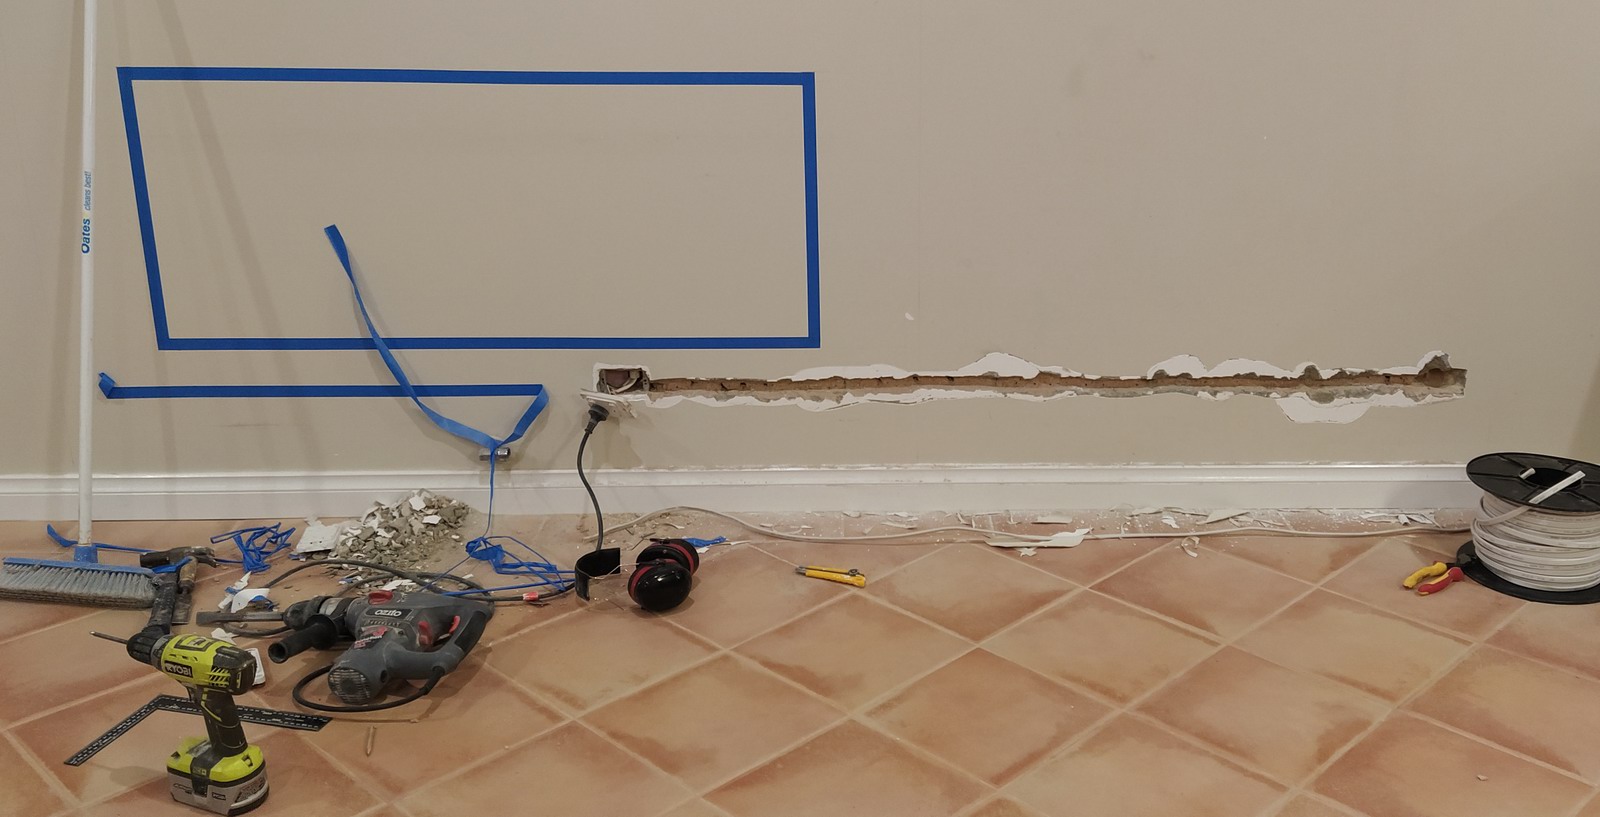 Hack out a channel |
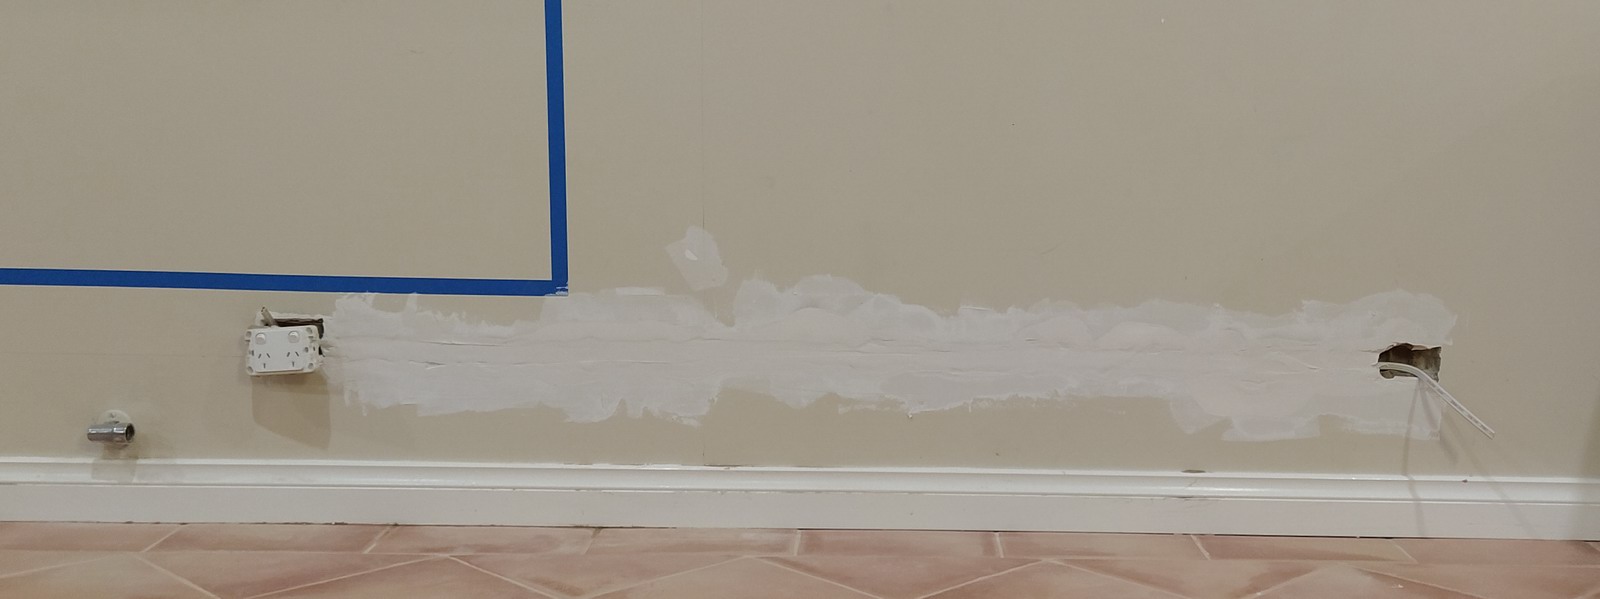 Stuff in some cable and then seal it up with cornice cement |
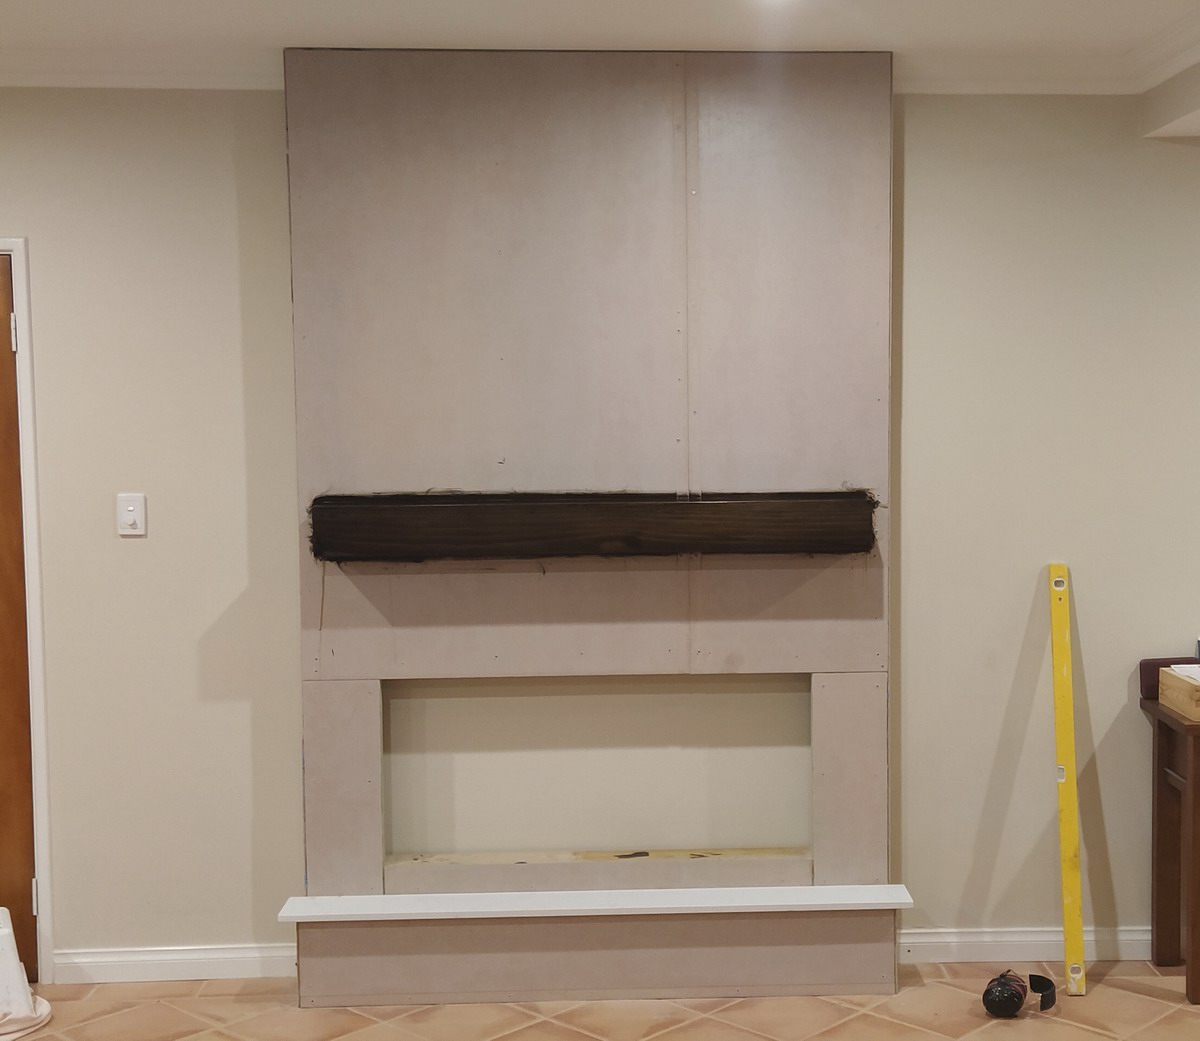
The strategy is just to good 'ol American stud wall frame it up, so I bought enough metres of 70x35 pine, it turned out that H3 treated is about the same price as anything so went with that. Treated pine is unecessary in this situation as it's unlikely to ever be attacked by fungus and termites. I bought a length of structural 120x35 as a lintel (google it).
All the framing was glue'n'screw, which is total overkill, but hey, my labour cost is free, and I don't have a framing gun. Next on was some fibro cement sheeting. I read the specs - the "tiles" we selected are 30kg per square metre, so with 6mm fibre cement I needed maximum 450mm stud centres, no problem. Yep, check the specifications and design for them!
Get the backbones in
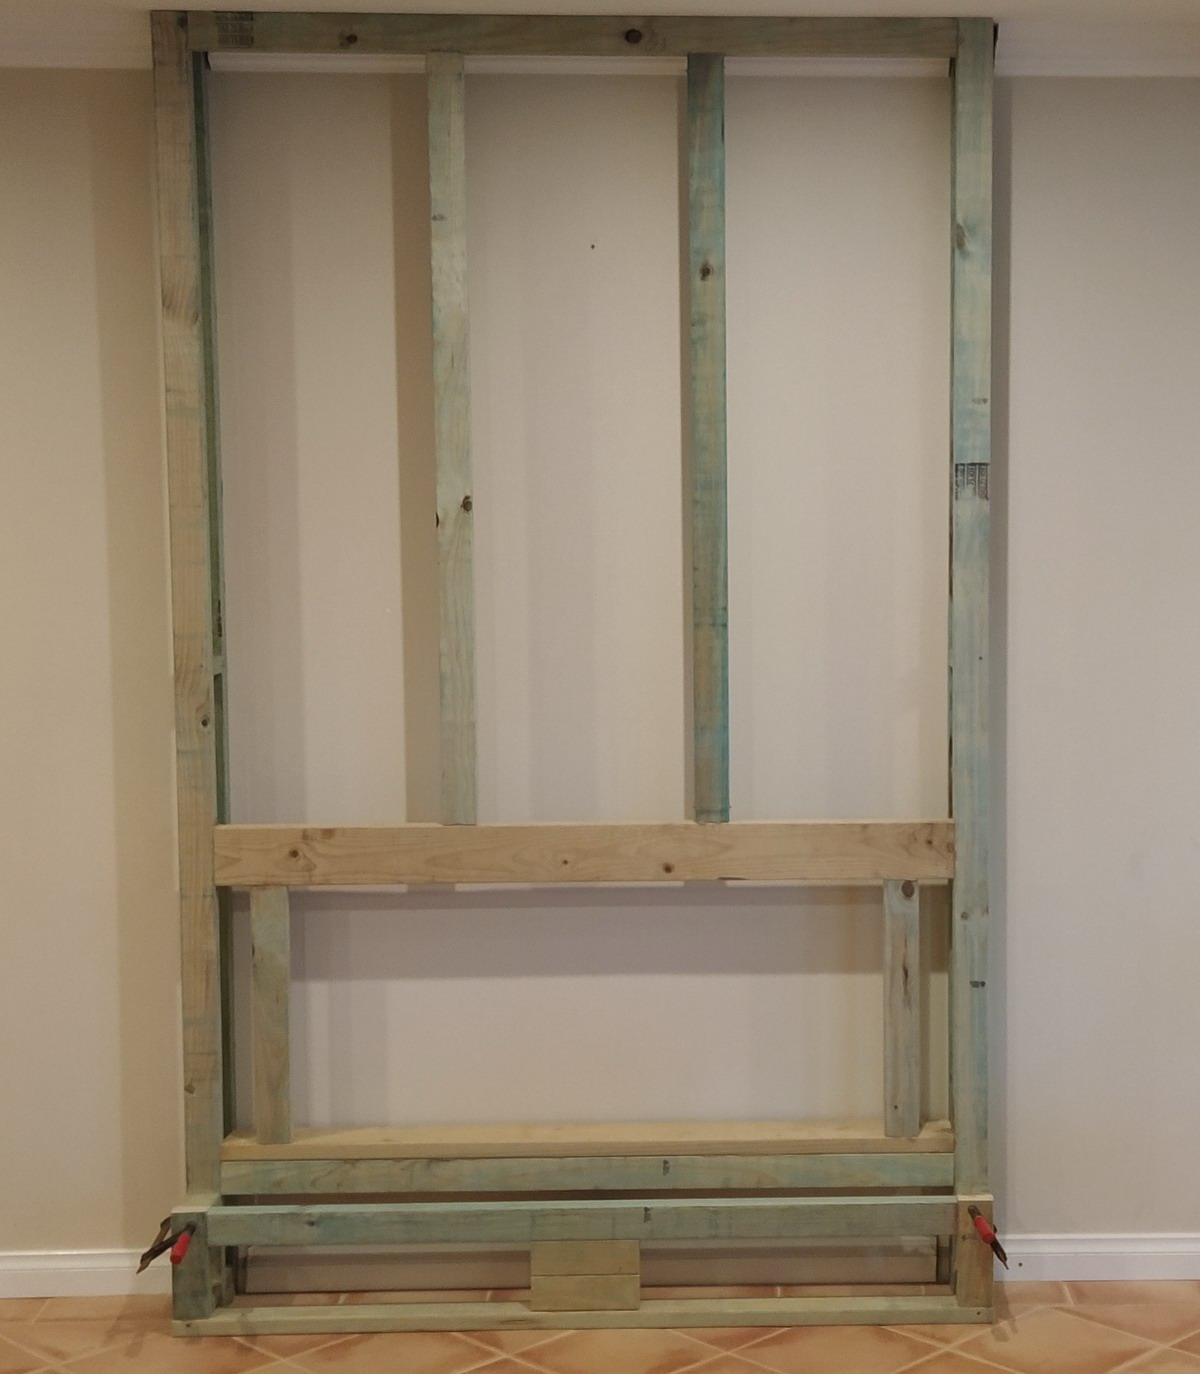
Keep going until all the framework is there - measures 140mm off the wall, with the bottom seat out to 280
I had already roughly drawn a plan up with the outer dimensions taking into account the thickness of the fibre cement, tiles, glues, so as I went I measured, cut, glued, screwed, repeat. The offset from the wall is 140mm, to deal with the 120mm depth of the fireplace. All the other dimensions are purely for aesthetics.
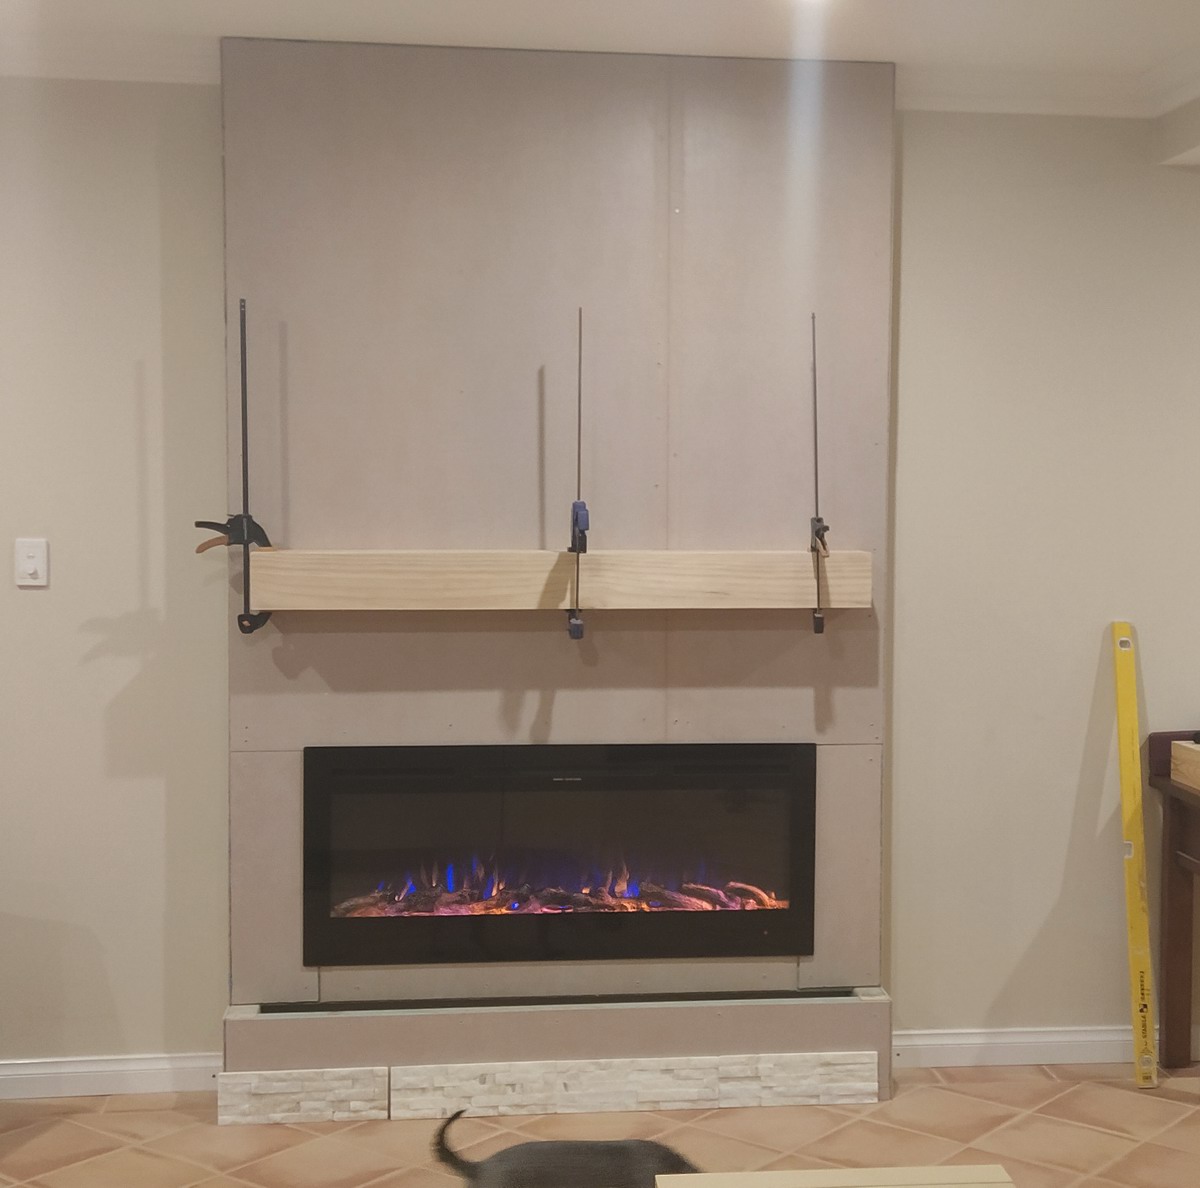
The missus specification called for a chunky mantel and a stone "seat". I ordered the stone from my usual supplier, the mantel was more challenging. I had a lot of options, and in the end I went with the cheapest and easiest one. Finished 19mm pine which I sliced and diced with my circular saw. You need to be diligent mitreing the edges of what is essentially a box if you only have a hand held circular saw. I would line it up, clamp a straight edge to it, and saw along the edge. Slow and tedious, but you can do it.
I glued and clamped the mantel together on the floor - except for the bottom piece. I put in some bracing with the offcuts, the idea being is that I would bolt it directly to the timber frame, and then glue the bottom piece on. This would make it very sturdy and completely floating, but it was also going to be a one way street. The only way it is ever coming off it so smash it off.

Mantel together, looking up, bolted into position without the bottom piece
Bottom piece glued and clamped with a sneaky test fit
Several layers of stain, the missus wanted it very dark, almost black, and then five or six coats of polyeurathane to seal it in.
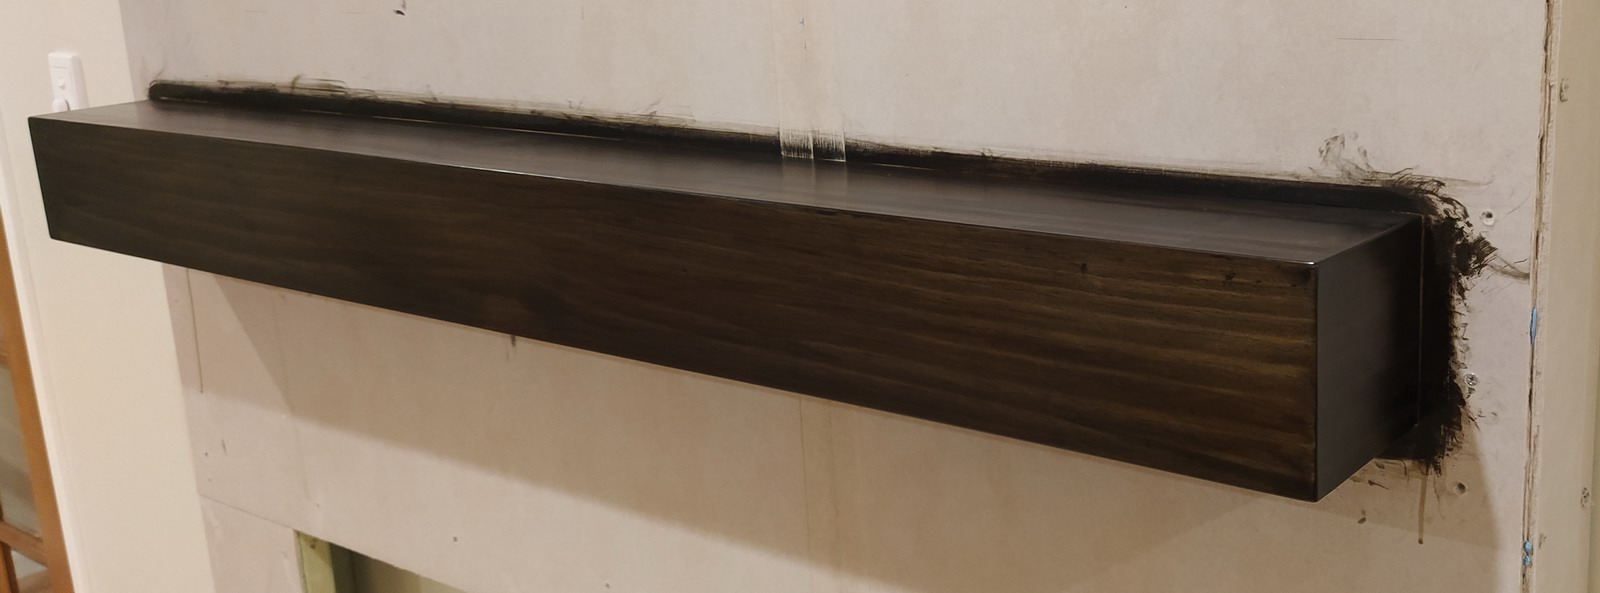
Stained and lacquered, prior to laying the tiles.
My stone people came through with the goods, matching our kitchen benchtop, but wow, engineered stone is expensive. $AUD500(2023) for 1.3m x 0.15 polished front and sides.
Stone "seat" in place, it's all about the aesthetics
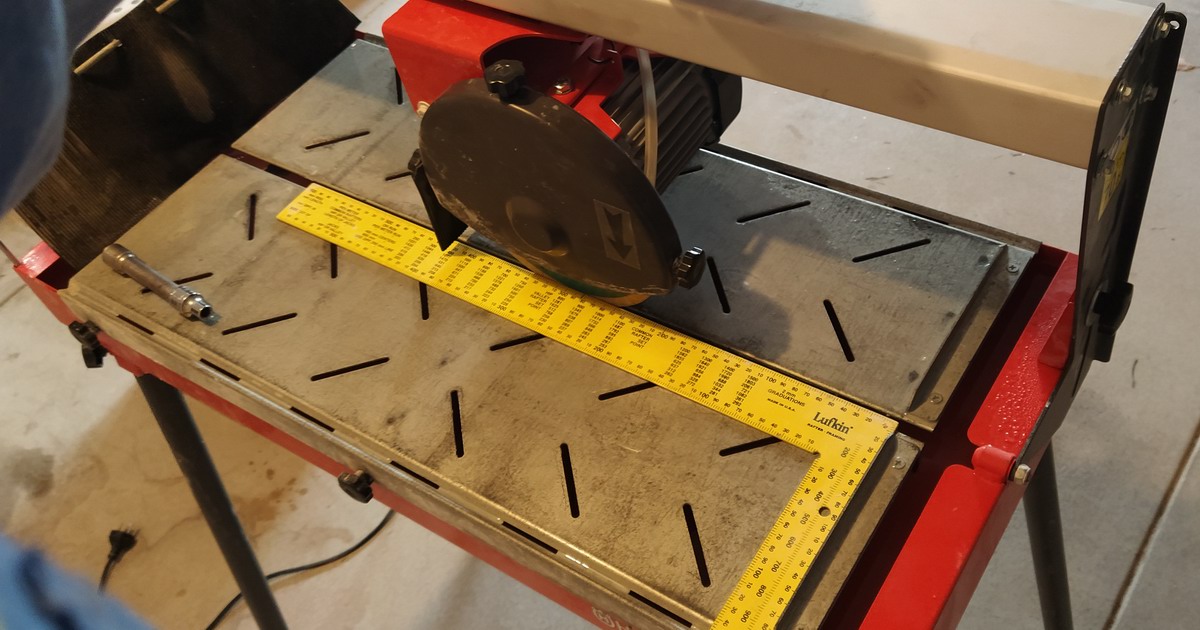
Square off the wet saw
Now I'd already cut up a bathroom and a half of floor to ceiling tiles so the wet saw blade was getting blunt and the guide runners were feeling rough. So I got in a new blade - be careful! While you can get continuous rim wet diamond blades, the cheap ones will chip chip chip your edges, especially on the mitre cuts, whereas the expensive ones will leave a much smoother edge. I couldn't source the factory one so I ordered in a "Barracuda" blade with the finest continuous rim diamonds. I set me back a hundred bucks as compared to the cheap and cheerful forty dollar one and I wasn't sure how smooth it would be, but I can report it makes a good clean cut.
I pulled the saw guide runners apart, cleaned up the bearings, lubed up with waterproof silicone grease and put it back together. I then bunged the straight edge on it and re-aligned it to be accurate to the millimetre. I didn't want to make every cut on an angle.
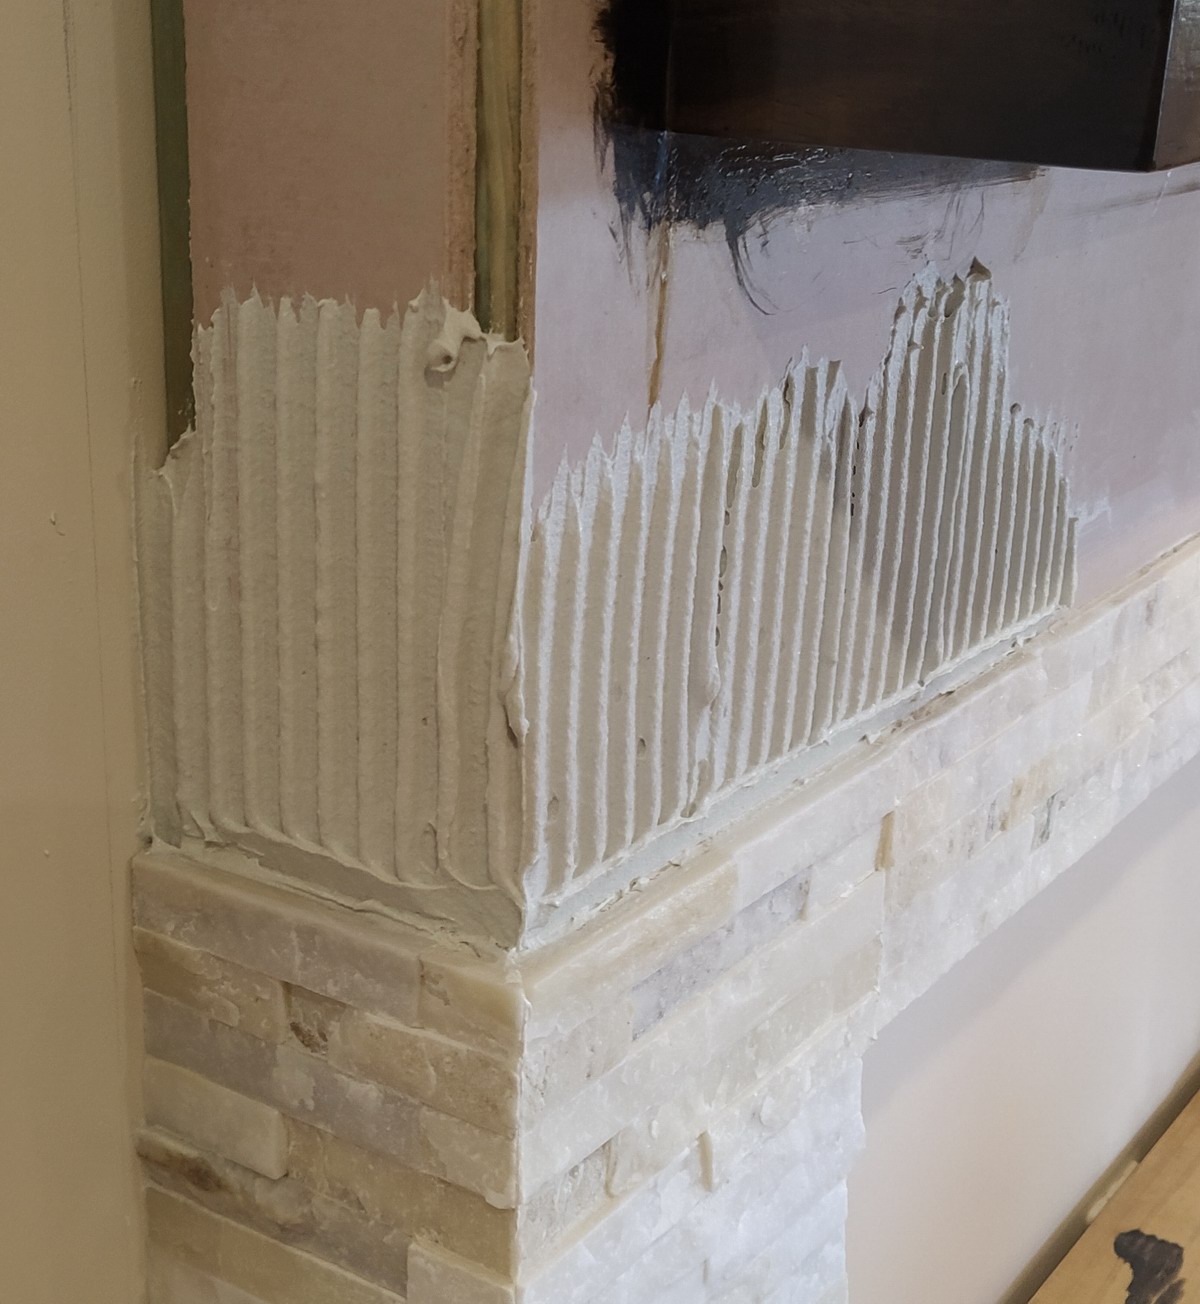
6mm notch trowel the wall
Again because my labour is free, all corners I mitre cut. And not only that, almost all of them were mitre cut from the same tile so that the stone would flow neatly around the mitre. Where I couldn't I looked carefully at the pieces I had avialable to me and selected the best fit.
The tiles are all real stone. That have been sliced up and epoxied together in convenient tile-shaped pieces. One advantage is that you don't have to be super accurate! Nice.

Butter the back of the "tile"
I just used normal tile glue, suitable for stone, and I went with a 6mm notch trowel. Because the backs of the tiles were not even close to flat, I back-buttered the tile as well as the wall troweling, to make sure it has full contact. I also siliconed each vertical interface, particularly the mitres, with a fancy polyurethane adhesive. This was overkill, I wouldn't do that again. I would still "grout" the interfaces, because even though they were all flush, the nature of stone and my not-always-perfect cutting meant there were gaps from time to time.
So now I'd just measure, cut, glue, mix more glue, repeat. I paused on day one above the fireplace opening, so that I could clamp those tiles in place to dry. Since I was working on weekends and after work, no problem, fits in fine. I tried two tile glues, one by Davco and one by Dunlop. While I found it harder to make consistently correct stiffness glue with the Davco, it was smooth and easy to work with, whereas the Dunlup was gritty but that helped it hold shape much better. It made sense it was by Dunlop - it stunk of rubber and had rubber microbeads all through it!
Up up and up, when I got close to the end I was snookered. I had ordered 6 extra packs of tiles, expecting a bit of breakage and waste, but what I wasn't expecting was 8 packs of broken tiles before they even got out of the bag! Now this may have been a transport issue, but some looked like they were broken from the factory. Hard to say. I get it, it's natural and hard to pack safely so it doesn't crack. The instructions clearly show to always stack on it's side, but, here I was with 3 more packs needed to finish the job. I had already managed to salvage 2 of the 8 broken packs by working about the breaks, but it was not enough. 3 packs short.
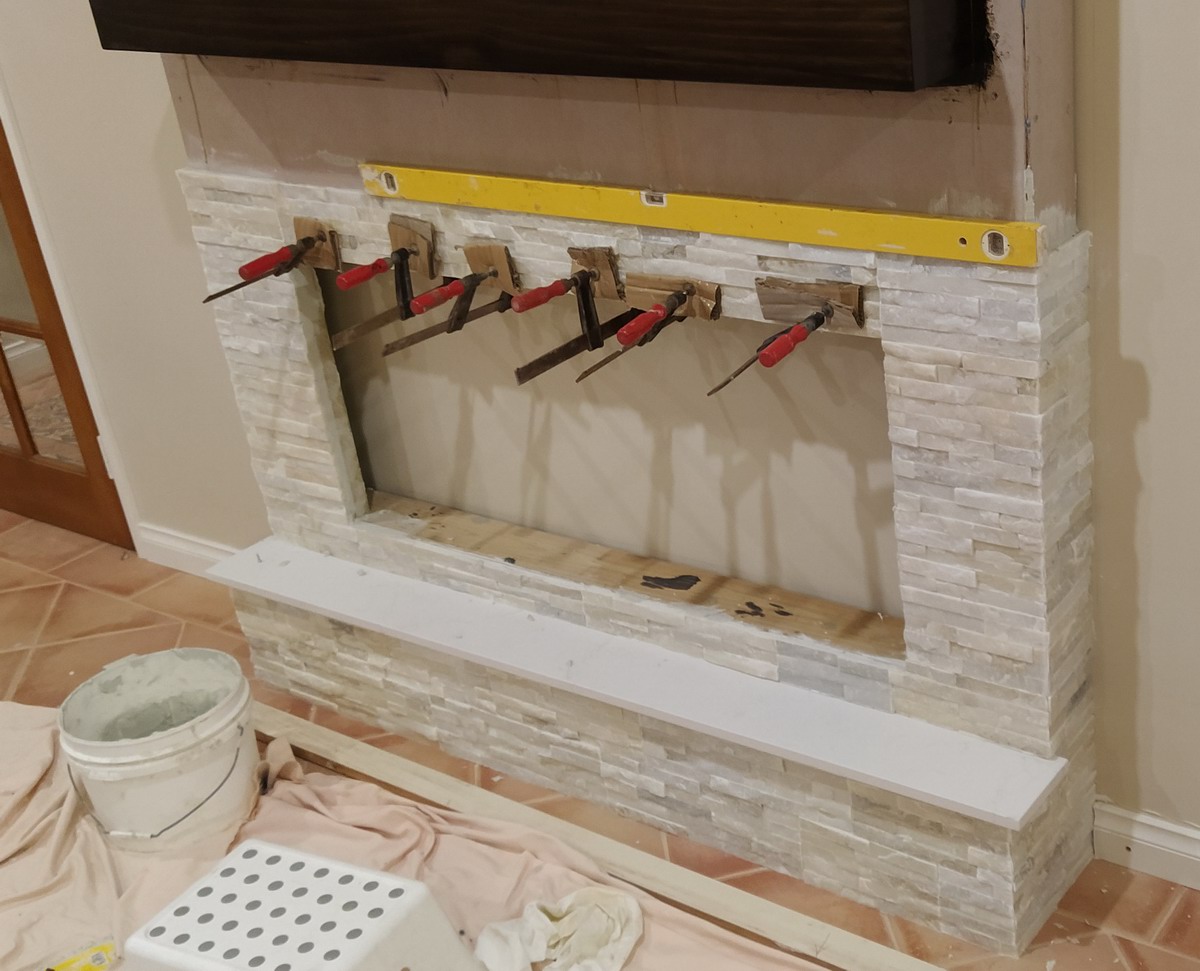
Pause and clamp to hold the tiles on the mantel.
I spoke to Bunnings, no problem, repack anything that was broken and they will send it back. Yah! Except that I had waited two weeks for it to all come in. It was my lucky day though. I took 6 packs back no questions asked and immediately refunded. They had some packs in store! I grabbed what I needed, went home and finished the job. Thanks Bunnings, and thanks Decor8 who make the stone!
So there you have it. Pop the faux fireplace into position (it rests in place under its own weight) and turn on just the light and it already feels 3 degrees warmer :-)
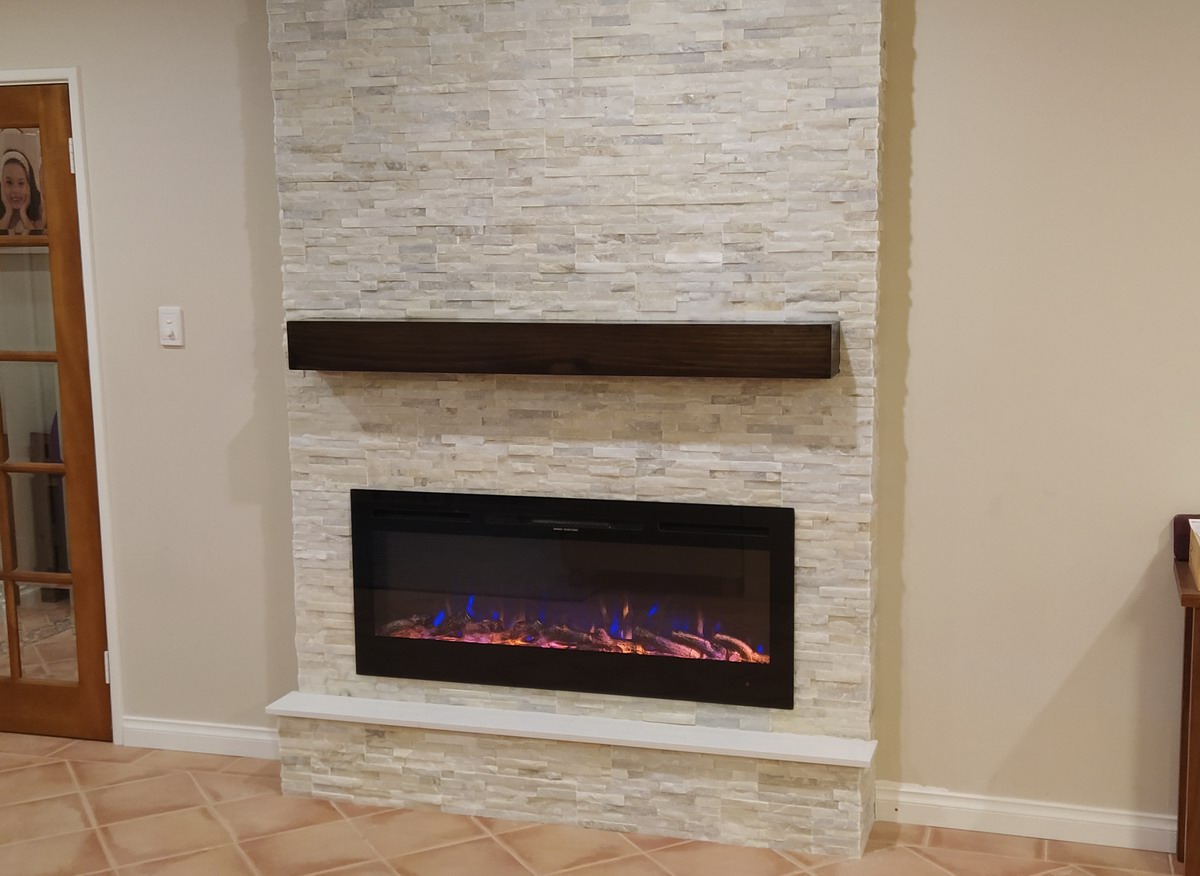
Looking good
Now I'm sure you want to know, so here is how much it cost me, in AUD, 2023
| Fireplace | $722 |
| Stone tiles | $562 |
| Stone seat | $500 |
| Framing wood | $189 |
| Stain and lacquer for mantel | $75 |
| Mantel wood | $67 |
| Fibro cement sheet | $60 |
| Tile glue | $35 |
| Adhesives, bolts, screws, misc, sundry | $70 |
So a grand total of AUD(2023) $2,180 and when you factor in my labour, (2 full 10 hour days days plus several half days), let's call it $12,180. If anyone in the Perth region wants one done, I'm sure I can arrange something for $10k cash :-)
JAW


 database